
Summary:
Paver Patios That Handle Real Life
A paver patio gives you the foundation for everything else. It’s where furniture sits, where people gather, where your outdoor entertainment actually happens. But not all patios are built the same, and cutting corners here means problems you’ll deal with for years.
Pavers beat poured concrete in almost every situation. They flex with ground movement instead of cracking. Individual pieces can be replaced if damaged. They drain better, which matters during Bay Area’s winter rains. And they give you design flexibility that concrete slabs simply can’t match. For Contra Costa and Alameda County properties, where soil conditions vary and drainage is often an issue, that flexibility isn’t just aesthetic—it’s functional.
Choosing Paver Materials for Bay Area Hardscaping
Concrete pavers are the practical choice for most Bay Area hardscaping projects. They’re cost-effective, available in dozens of styles and colors, and hold up well when properly installed. You’re looking at a material that can mimic natural stone at a fraction of the cost, with better consistency and easier maintenance.
Natural stone pavers—flagstone, bluestone, travertine—bring character that concrete can’t replicate. Each piece is unique. The color variations and natural textures create visual interest that improves with age. The tradeoff is cost and installation complexity. Natural stone requires more careful handling and precise installation, but for homeowners in Contra Costa County and Alameda County looking for something distinctive, it’s worth the investment.
Permeable pavers solve drainage problems before they start. Instead of shedding water like traditional pavers, they let it filter through gaps into the ground below. This reduces runoff by 70-90%, eliminates standing water, and helps prevent the flooding issues that plague many Bay Area properties during winter storms. If your yard has drainage issues—or if you want to avoid them—permeable pavers are the smart play.
The base matters as much as the pavers themselves. Proper installation means excavating to the right depth, laying compacted gravel, adding sand, and then setting pavers with edge restraints and joint stabilization. Skip any of these steps and you’ll have settling, shifting, and uneven surfaces within a couple years. This is where working with experienced hardscaping contractors in Alameda County or Contra Costa County makes the difference between a patio that lasts decades and one that becomes a maintenance headache.
Color and texture should complement your home’s exterior, not compete with it. Warm-toned homes look better with earth-toned pavers. Modern architecture can handle sleeker, more uniform surfaces. Traditional homes often benefit from varied textures and natural color variations. Visit completed hardscaping projects if possible—photos don’t capture how materials actually look in California’s light or how they feel underfoot.
Paver Patio Costs and ROI in Contra Costa County
Most homeowners in the Bay Area spend $6,000 to $22,000 on paver patio installations, depending on size, materials, and features. A straightforward 12×12 patio with standard concrete pavers runs $3,500 to $6,000. Expand to 20×20, upgrade to natural stone, add built-in seating or lighting, and you’re looking at $15,000 to $25,000 or higher.
Cost per square foot typically ranges from $10 to $25 installed for concrete pavers, with natural stone and permeable pavers pushing into the $20 to $30 range. Labor represents a significant portion of that cost—excavation, base preparation, grading, paver installation, edge work, and joint stabilization all require skill and time. Cheap labor usually means shortcuts, and shortcuts mean problems you’ll pay to fix later.
Site conditions impact pricing significantly. Sloped yards need extensive grading. Poor drainage requires additional base work and possibly French drains or catch basins. Limited access means more manual labor and longer installation times. These aren’t excuses to inflate estimates—they’re legitimate factors that affect the actual work required. A reputable hardscaping contractor in Contra Costa County or Alameda County will assess your specific site and give you accurate numbers based on real conditions.
The return on investment is measurable. Outdoor features like paver patios can boost home value by up to 7%, and Bay Area buyers actively seek properties with functional outdoor living spaces. You’re not just spending money on hardscaping—you’re adding an amenity that makes your home more valuable and more enjoyable while you’re living in it. That’s the kind of improvement that pays dividends immediately and again when you sell.
Outdoor Kitchens for Year-Round Entertaining
An outdoor kitchen transforms your backyard from a place you occasionally use to a space that competes with your indoor living areas. Instead of cooking inside while guests are outside, you’re part of the gathering. Everything you need is right there—no running back and forth, no missing conversations, no feeling like the hired help at your own party.
Bay Area’s climate makes outdoor kitchens practical nearly year-round. Mild winters, long summers, temperate spring and fall—you’re looking at usable outdoor space 10-11 months annually. That’s fundamentally different from regions where outdoor kitchens sit idle half the year. In Contra Costa and Alameda County, an outdoor kitchen isn’t a luxury that rarely gets used. It’s an extension of your home that sees regular action.
Essential Components for Outdoor Kitchen Design
The grill is your starting point. Built-in grills integrated into your outdoor kitchen design beat portable units for durability, aesthetics, and functionality. Stainless steel construction handles Bay Area’s weather—fog, sun, occasional rain—without corroding or degrading. Size your grill based on how you actually cook. If you regularly feed a crowd, don’t compromise on cooking surface or BTU output.
Counter space is where most outdoor kitchen designs fall short. You need room to prep ingredients, plate food, and set things down without juggling. Granite and concrete countertops handle heat, moisture, and UV exposure without cracking or fading. They’re the standard for outdoor kitchens in Alameda County and Contra Costa County because they actually last. Tile can work if it’s properly rated for outdoor use and sealed correctly, but it requires more maintenance.
Storage makes your outdoor kitchen functional instead of frustrating. Cabinets for utensils, trash pullouts, propane storage, and general supplies mean you’re not constantly walking inside. Use weather-resistant materials—marine-grade polymer or stainless steel, not wood products that’ll warp and deteriorate. Soft-close hinges and drawer glides rated for outdoor use prevent the constant slamming that destroys cheaper hardware.
A sink adds convenience that’s hard to overstate. Rinsing vegetables, washing hands, filling pots—it all happens right there in your outdoor entertainment space. You’ll need to run water lines and drainage, which increases installation complexity and cost, but the usability improvement is substantial. If budget doesn’t allow for plumbing now, design your layout so adding a sink later doesn’t require rebuilding everything.
Refrigeration moves outdoor kitchens from functional to fully equipped. An outdoor-rated refrigerator keeps drinks cold, stores perishables, and eliminates trips inside every time someone wants a beer. These units are built to handle temperature fluctuations and humidity that would kill a standard refrigerator. They cost more but they’re engineered for the job.
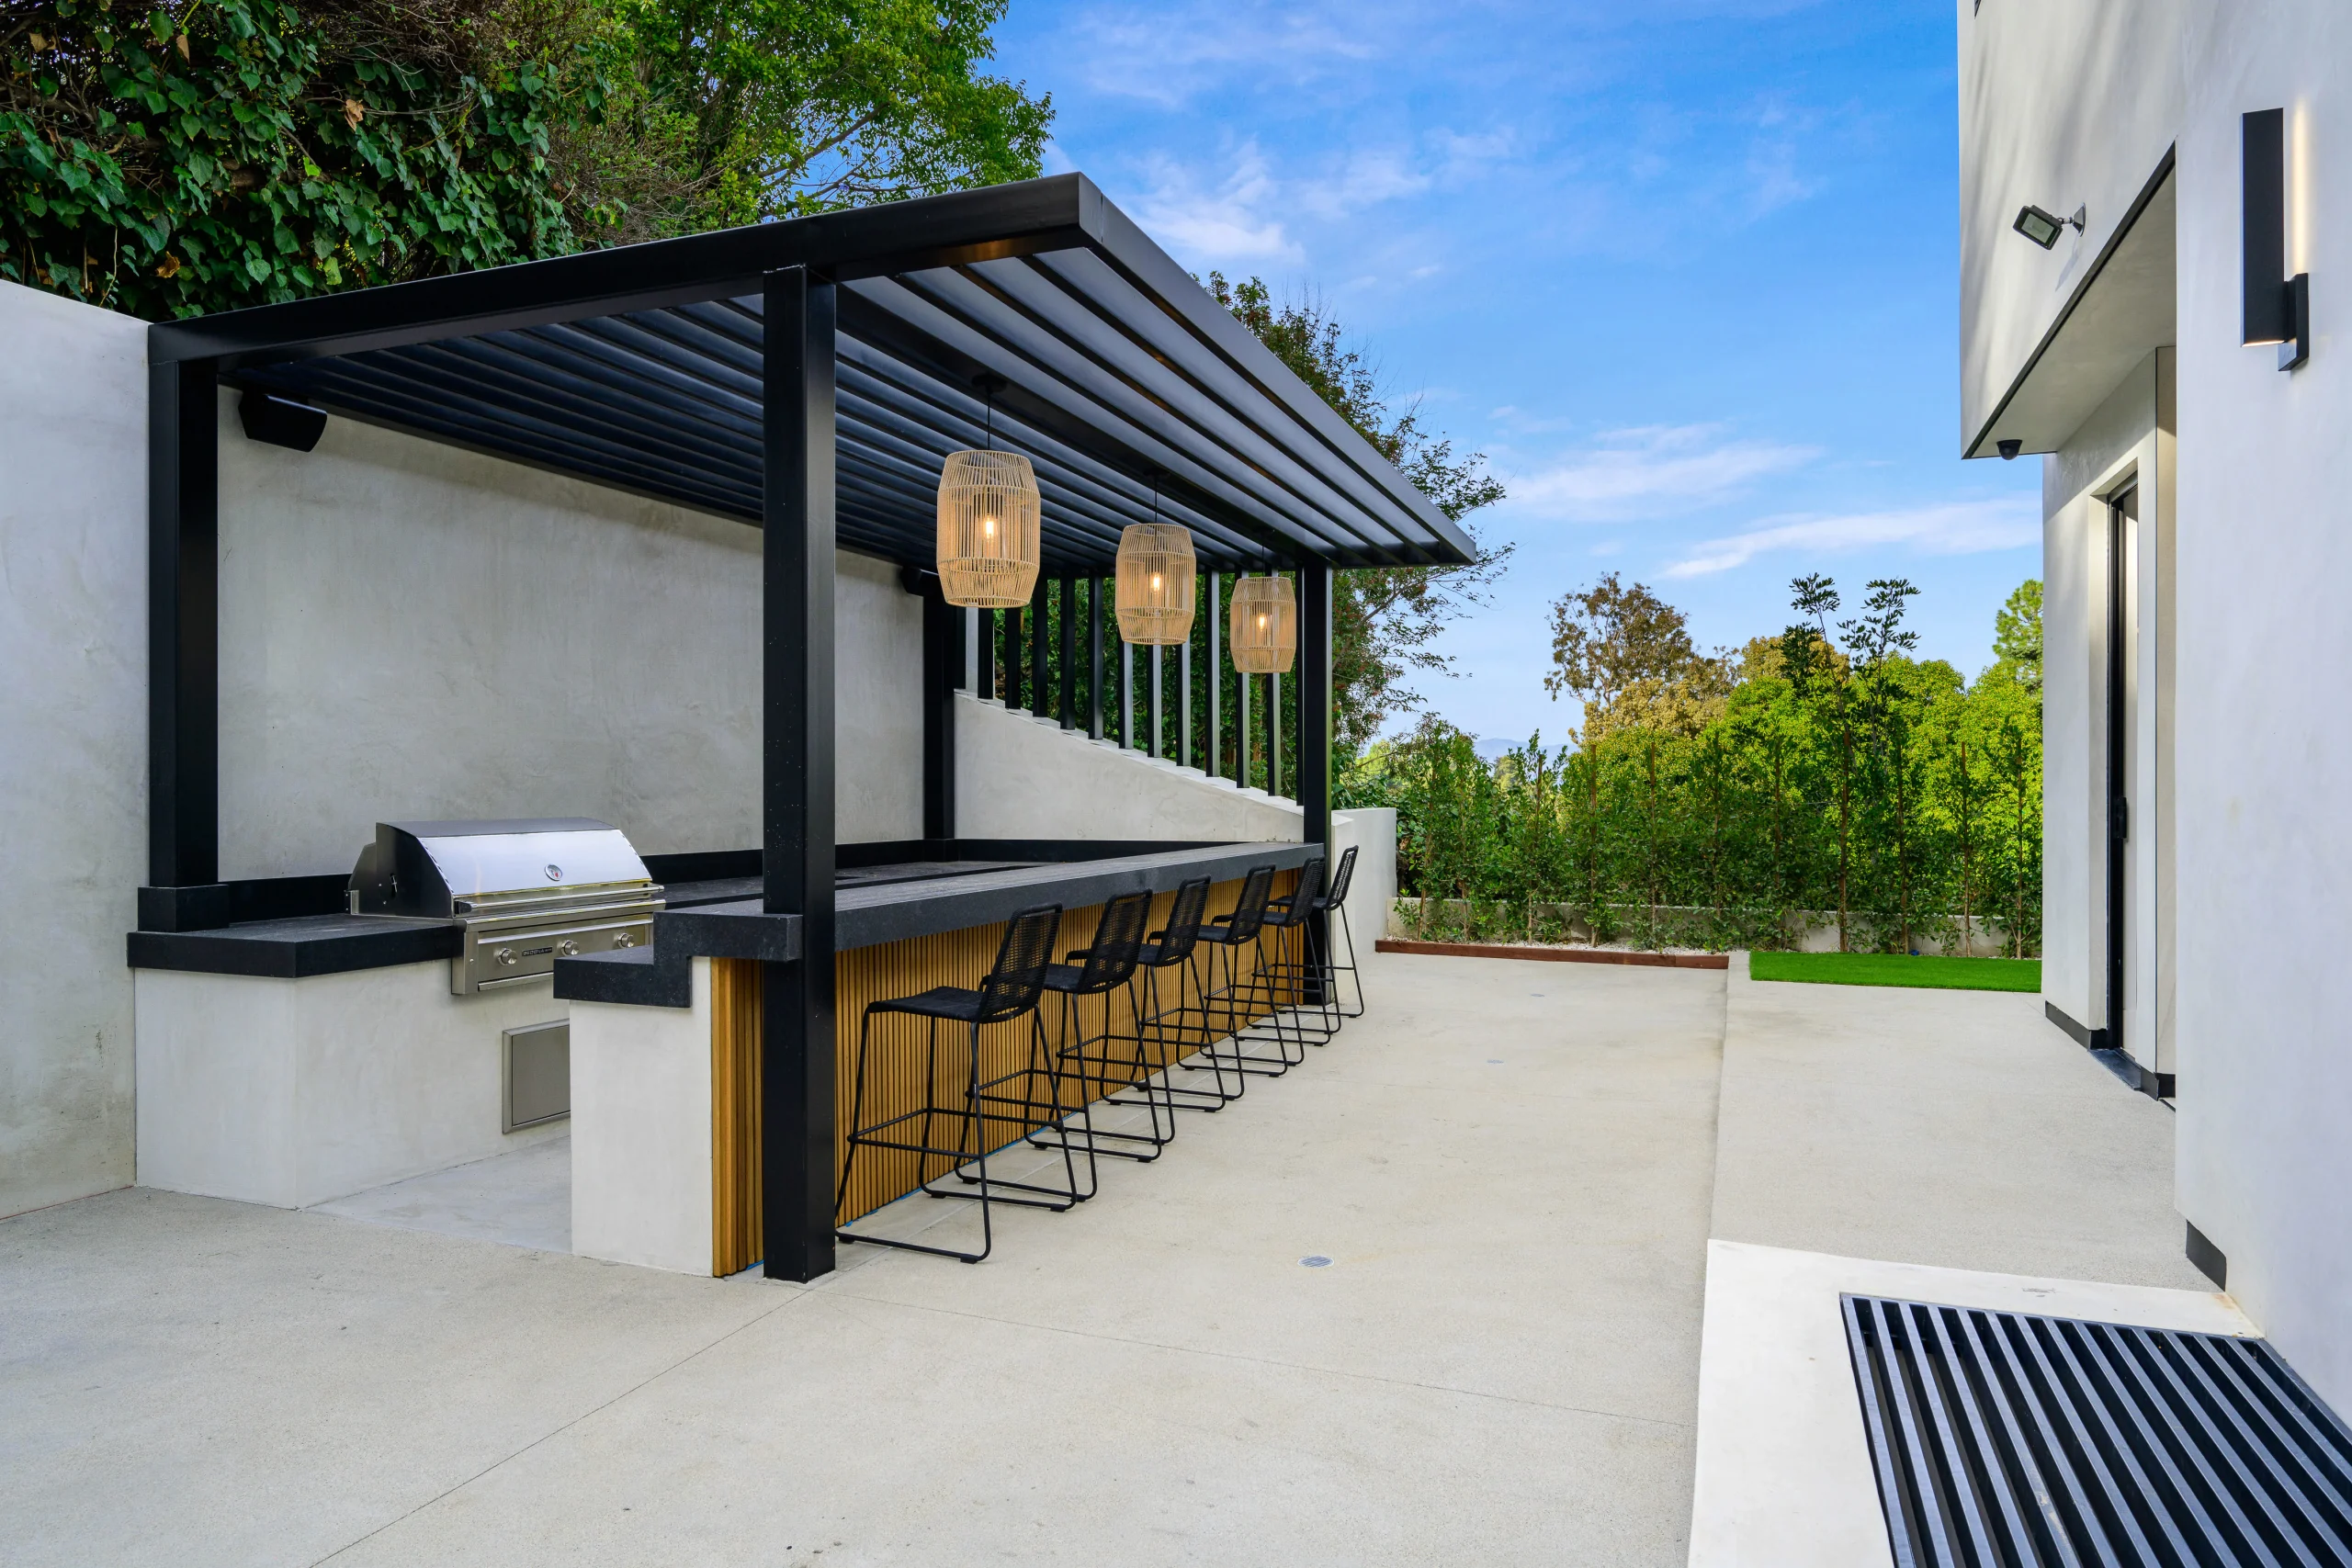
Shade extends usability dramatically. A pergola, roof extension, or retractable awning keeps you cooking comfortably even when the sun’s intense. It also protects your appliances and countertops from constant UV exposure, which extends their lifespan. In Contra Costa County’s summer heat, shade isn’t optional if you want to use your outdoor kitchen during the day.
Outdoor Kitchen Mistakes That Cost Money
Undersizing the space is the most common outdoor kitchen design mistake. What looks adequate on paper feels cramped in reality. You need room for the cook to work, space for people to stand around without blocking access, and clearance for movement. Plan for at least six feet of open space around cooking areas. If your outdoor kitchen feels tight, people won’t use it the way you intended.
Ignoring wind patterns ruins the experience. If smoke from your grill blows into seating areas or back toward your house, your outdoor entertainment hub becomes unusable when you’re actually cooking. Observe wind direction at different times of day before finalizing your hardscaping layout. Sometimes shifting the grill location by a few feet solves the problem completely.
Using indoor-rated materials outdoors is expensive short-term thinking. Outdoor environments are harsh—constant sun, temperature swings, moisture, and in Bay Area locations near the coast, salt air. Materials not rated for outdoor use will fade, crack, rust, or deteriorate within a few years. Stainless steel, natural stone, and marine-grade materials cost more initially but last decades. That’s the difference between hardscaping that adds long-term value and an expensive mistake you’ll replace in five years.
Skipping permits creates problems you’ll deal with eventually. Gas lines, electrical work, and plumbing all require permits in Contra Costa County and Alameda County. Unpermitted work can cause issues when you sell—title companies and buyers’ inspectors will find it. Worse, if something goes wrong, your insurance may not cover damage from unpermitted installations. Do it right the first time.
Inadequate lighting makes your outdoor kitchen unusable after dark. You need task lighting over prep and cooking areas so you can actually see what you’re doing. Ambient lighting creates atmosphere and makes the space inviting. Don’t rely on a single fixture. Layer your lighting—under-counter LEDs, pendant lights over bar areas, path lighting for safety. Proper lighting transforms outdoor kitchens from functional to genuinely enjoyable after sunset.
Poor drainage planning leads to standing water, slippery surfaces, and long-term damage. Water needs somewhere to go. If your outdoor kitchen sits on a patio, ensure proper slope away from your house and integrate drainage solutions. Permeable pavers naturally handle water infiltration. Traditional pavers need proper grading and potentially channel drains. This isn’t optional—it’s fundamental to hardscaping that lasts.
Fire Pit Design That Extends Your Outdoor Season
A fire pit turns your backyard into a space you can use when temperatures drop. It’s the difference between retreating indoors in October and actually enjoying your outdoor entertainment area through fall and winter. In Contra Costa and Alameda County, where evenings cool down even in summer, a well-designed fire pit extends usability by months.
Fire pits come in two basic types: wood-burning and gas. Wood-burning gives you the authentic campfire experience—crackling sounds, wood smoke smell, and the ritual of building and tending a fire. Gas fire pits offer convenience—flip a switch and you have instant heat with no cleanup. Your choice depends on whether you value atmosphere or ease of use more. Both work in Bay Area hardscaping projects. Both have trade-offs.